Your Personal Web Application Plan
Activity Instructions
Estimated Time: 120 minutes
In the previous weeks you should have come up with an idea for your personal web application. Before we build our personal (final) project we need to do some planning. You have seen site plans used to build other projects. They contain many of the details we needed to know in order to build sites. We should prepare a similar document for our personal sites now.
01 Create a new folder for your new site
Let's start by adding a folder to the 'wdd131' folder. You can do this in file management or on Visual Studio Code.
Give this folder a name and remember this will be a part of the URL (web address), so keep it short, simple, and professional. The folder name should be all lowercase with no spaces. The name should also have something to do with the topic of your personal site. This folder will be at the root level of your directory and will contain the new personal site project.
02 Add Site Plan Files
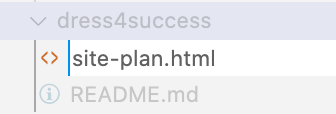
Add a file to your new folder called site-plan.html. The example here shows the new folder called 'dress4success'. Yours will, of course, have a different named folder. You also don't need a README.md file like is shown in the images if you don't choose to have one.
You have two options for your site plan. One option is to create your own site plan from scratch. You are not required to use a template. For either option you need to provide the following for your site-plan: purpose, audience, dynamic elements used, logo, colors, fonts, content, and wireframes.
The other option is to use an existing template by going to Site Plan Template, right-click on the page, and view the source code. (On Chrome it's the pop-up menu option called 'View Page Source'.)
To use the template, copy all the HTML code. You can use Cmd+A or Ctrl+A to select it all quickly, then copy it.
Paste the code into your site-plan.html page in VSCode and save the file.
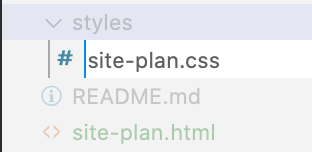
Create a new 'styles' folder. And create a site-plan.css file inside that folder.
Go to: Site Plan CSS and copy all the code.
Paste the code into the site-plan.css file in VSCode and save it. Then complete each section.
Project Requirements
By the end of this course:
- The personal site must consist of a home page and at least one child page.
- The website must be hosted on the web.
- Each page of your Web site must satisfy the following requirements:
- Significant textual content, appropriate for your audience, so that they can understand the meaning and message of this site.
- At least one image that relates to the content of the page.
- Working links to your child page(s).
- Be laid out and styled according to your site plan wireframes.
- Be responsive
- Be visually appealing and easily readable.
- Be valid HTML and CSS
- Score at least 96 on Lighthouse on Performance and Accessibility.
- The site should have dynamic elements provided by Javascript, your code should show elements of the following:
- It should show some level of organization: at a minimum it should have more than one function.
- It should include DOM interaction: select an element, modify it, and listen for and react to events
- It should show examples of conditional branching
- Each of the following should be used: Objects, ES Modules, Arrays and array method usage (forEach, map, reduce, filter, etc)
03 Purpose and Audience
In 2–3 sentences, write a purpose statement for your site and write about your intended audience.
04 Description of the dynamic elements
Describe how you will use Javascript to add dynamic elements to your site.
05 Logo
Choose a logo images for your personal site. You can create one if you'd like. Sites like
Canva.com or Adobe Logo Maker or freelogodesign.org can be options if you don't make yours from scratch.
06 Colors and Fonts
Choose a color scheme and one or more fonts that you think will work well and enter the information into the plan's HTML and CSS.
07 Content
Write the text that will be on the pages for your site, generate any data that you will use, and find the images/icons/graphics you need.
08 Wireframes
Create two wireframes, one for the home page and one for the child page for your site.
Add your wireframes as images or links to the site plan.
09 Submit
As soon as you have this plan completed submit it! The sooner you get it approved the sooner you can get started building your project. Don't wait until the last minute on this one!
Remember, we don't have an
index.htmlor home page inside our personal site project folder yet. So you have to type in thesite-plan.htmlat the end of the URL web address and select Enter to get it to open.Something like this: your-account.github.io/wwd131/personal-folder/site-plan.html
Your site plan should then come up. Use that URL to submit.
Submit the GitHub link to your site-plan.html page to I-Learn.